
RealTruck
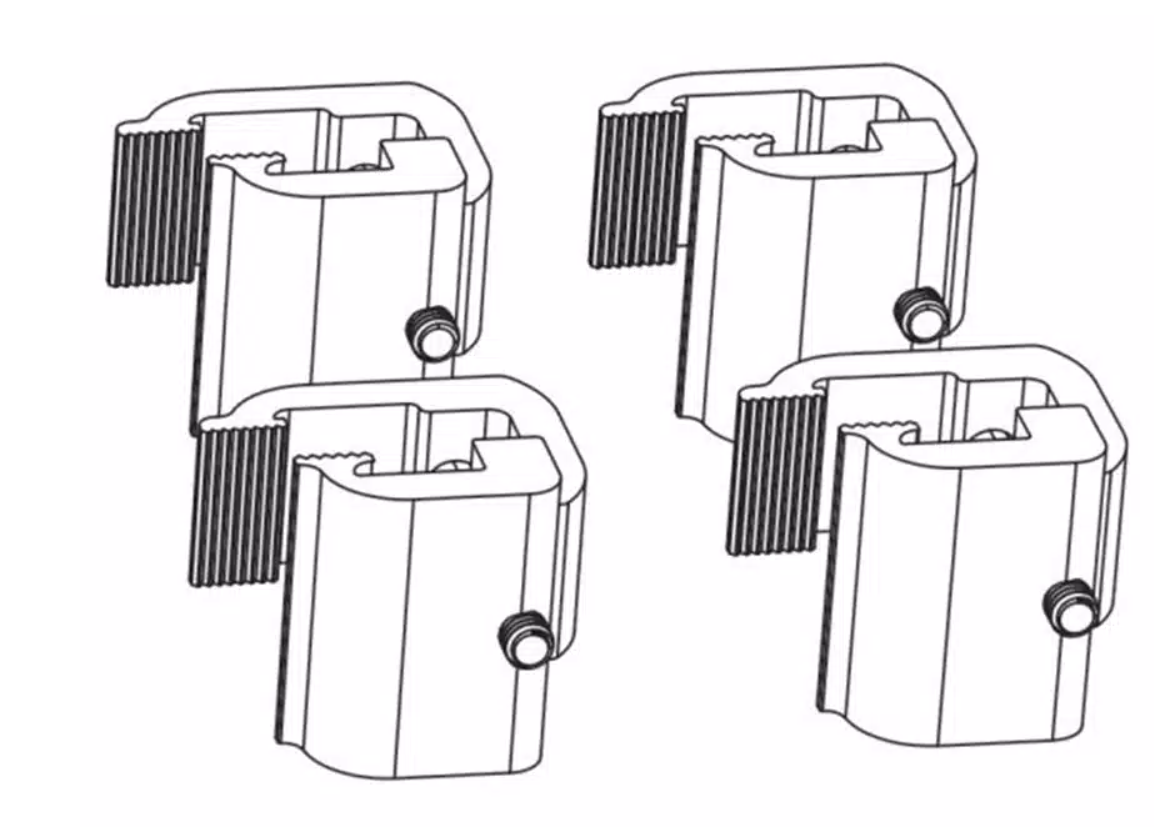
Retrax Replacement XR Clamp and Hardware Kits
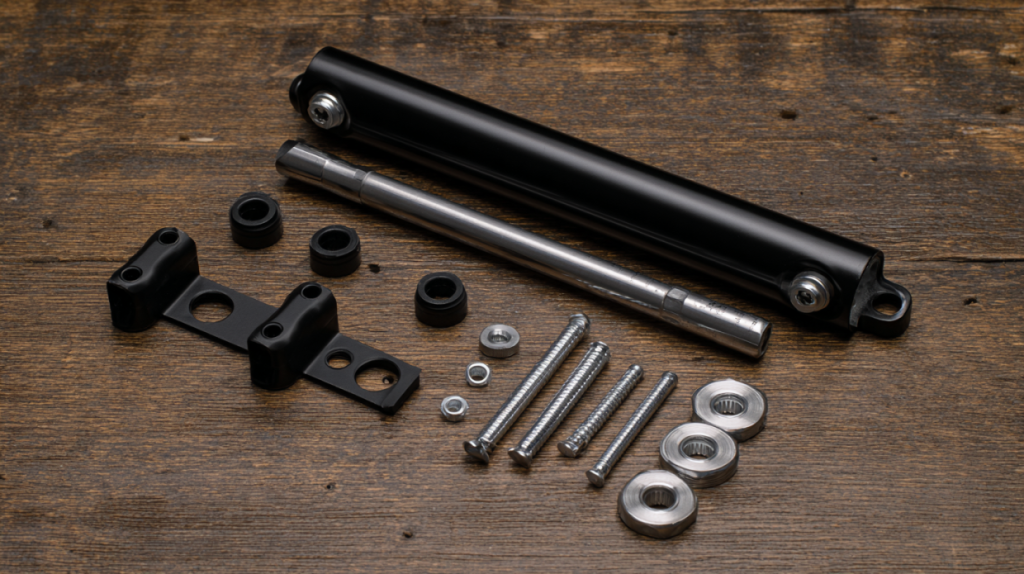
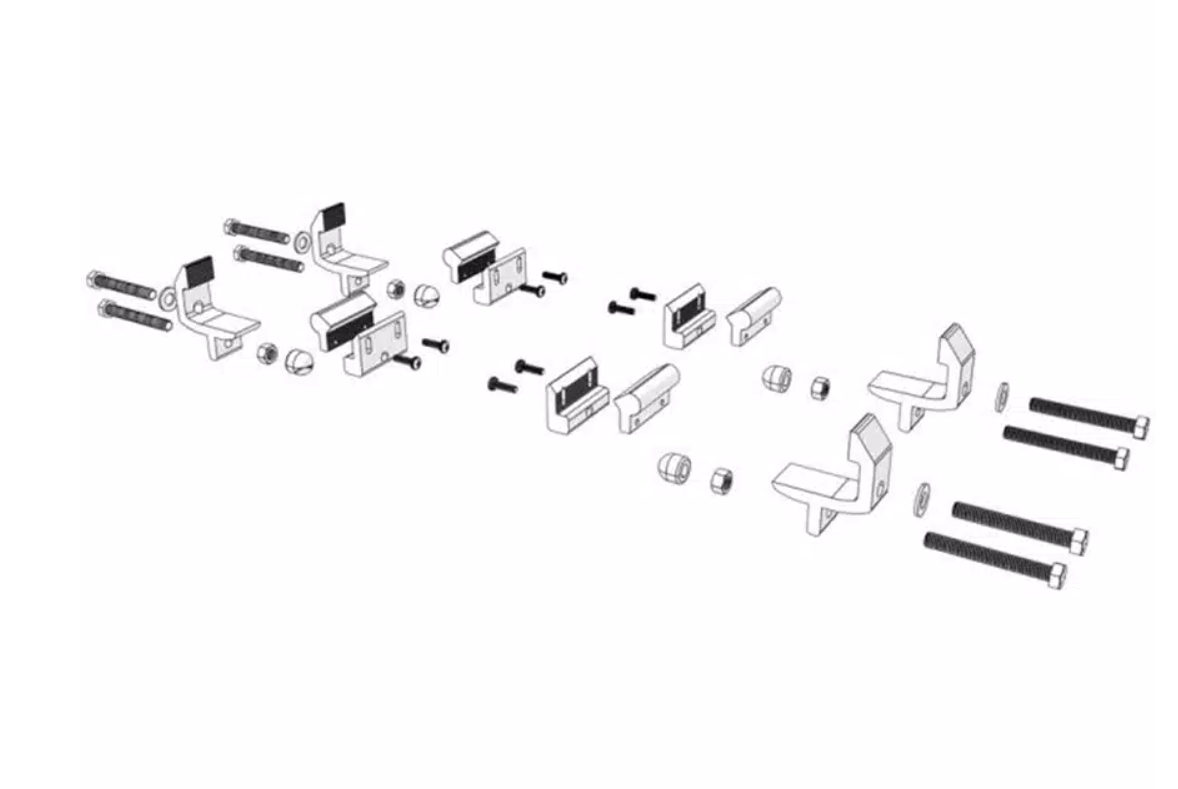
- Kit of C-Clamps and Mounting Hardware for Assembly and Attachment of the Cover to the Truck Bed.
Includes: 4-6 clamps (depending on application), additional support bolt (depending on application), pack of 6 screws, and Allen wrench
RealTruck
Retrax Replacement MX Clamp and Hardware Kits
- Kit of C-Clamps and Mounting Hardware for Assembly and Attachment of the Cover to the Truck Bed.
Includes: 4-6 clamps (depending on application), additional support bolt (depending on application), pack of 6 screws, and Allen wrench
Fits RetraxONE MX, RetraxPRO MX, PowertraxONE MX, and PowertraxPRO MX Applications
RealTruck
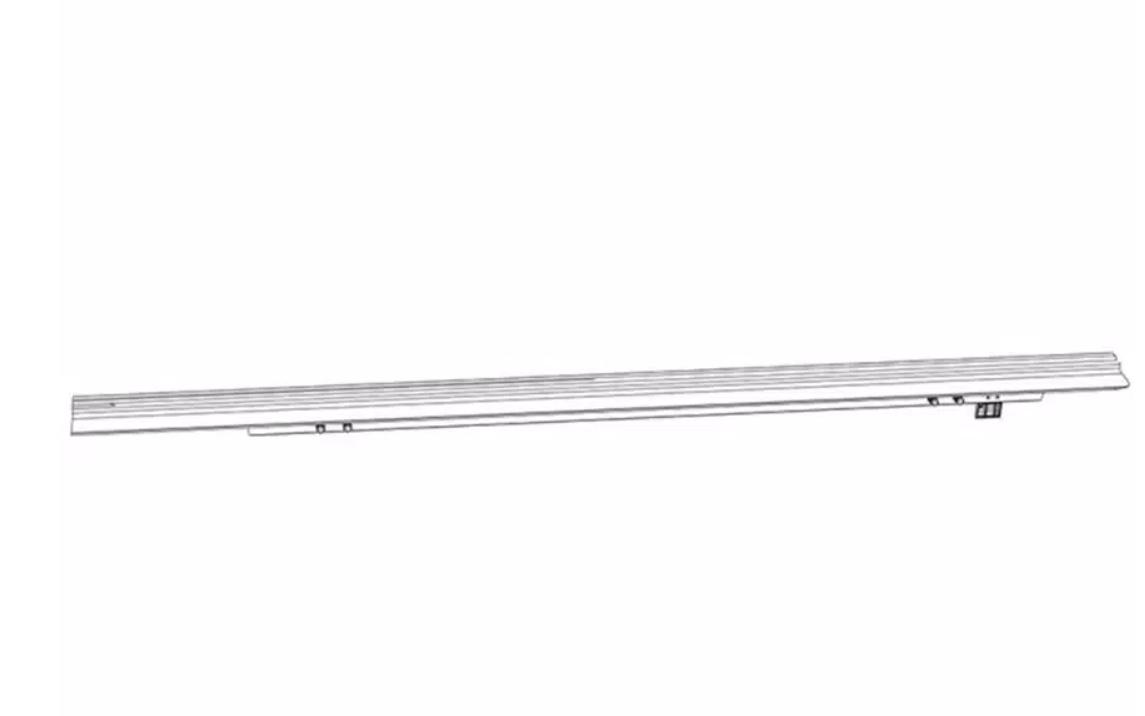
Retrax Replacement Front Cover for Spiral Canister
- Matte Finished Aluminum Front Cover Housing Lid that Attaches to Canister and Used to Protect Cover as it Rolls In.
Includes: one aluminum front cover housing lid
Fits all RetraxONE MX, RetraxONE XR, RetraxPRO MX, RetraxPRO XR, PowertraxONE MX, PowertraxONE XR, PowertraxPRO MX, and PowertraxPRO XR Applications
RealTruck
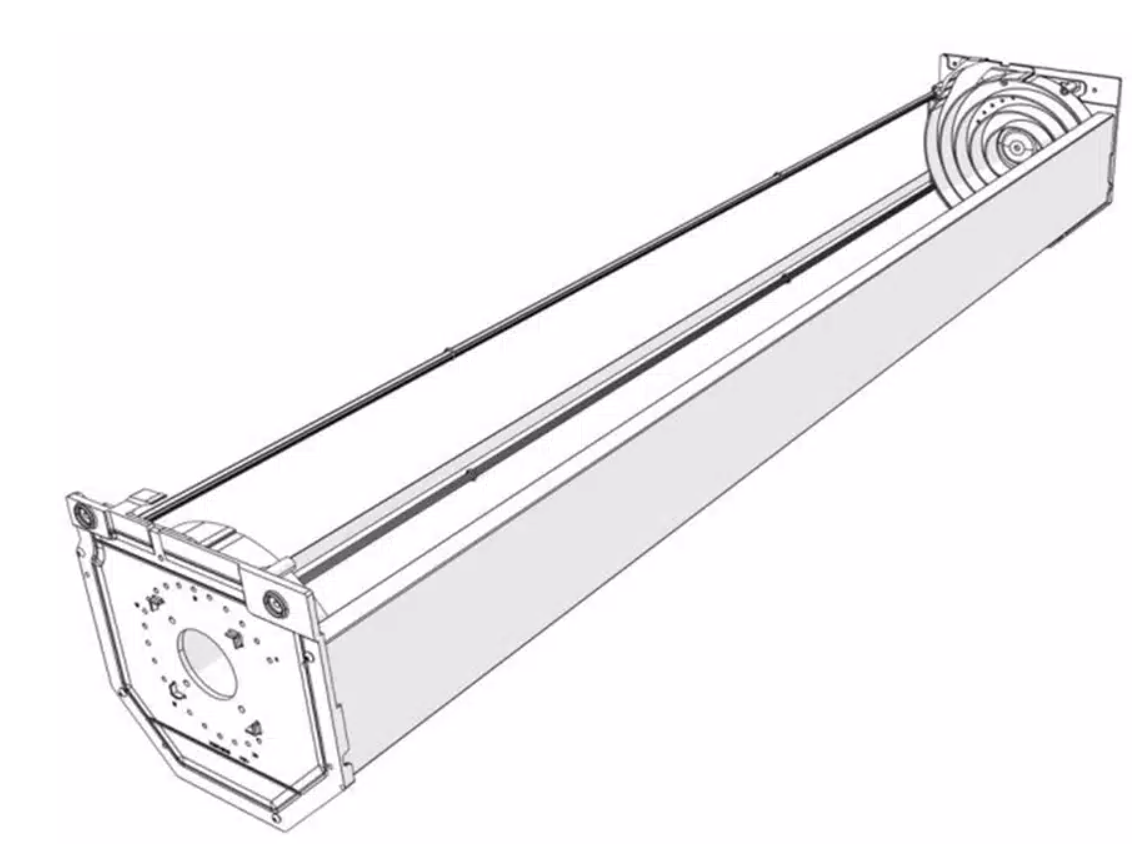
Retrax Replacement Spiral Canister
- Aluminum Spiral Canister to Receive and Protect the Rolling Cover for All Electric or Manual Retrax Truck Bed Covers.
Includes: one spiral canister
Fits all PowertraxONE MX, PowertraxONE XR, PowertraxPRO MX, and PowertraxPRO XR or RetraxONE MX, RetraxONE XR, RetraxPRO MX, and RetraxPRO XR Applications
RealTruck
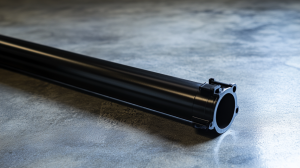
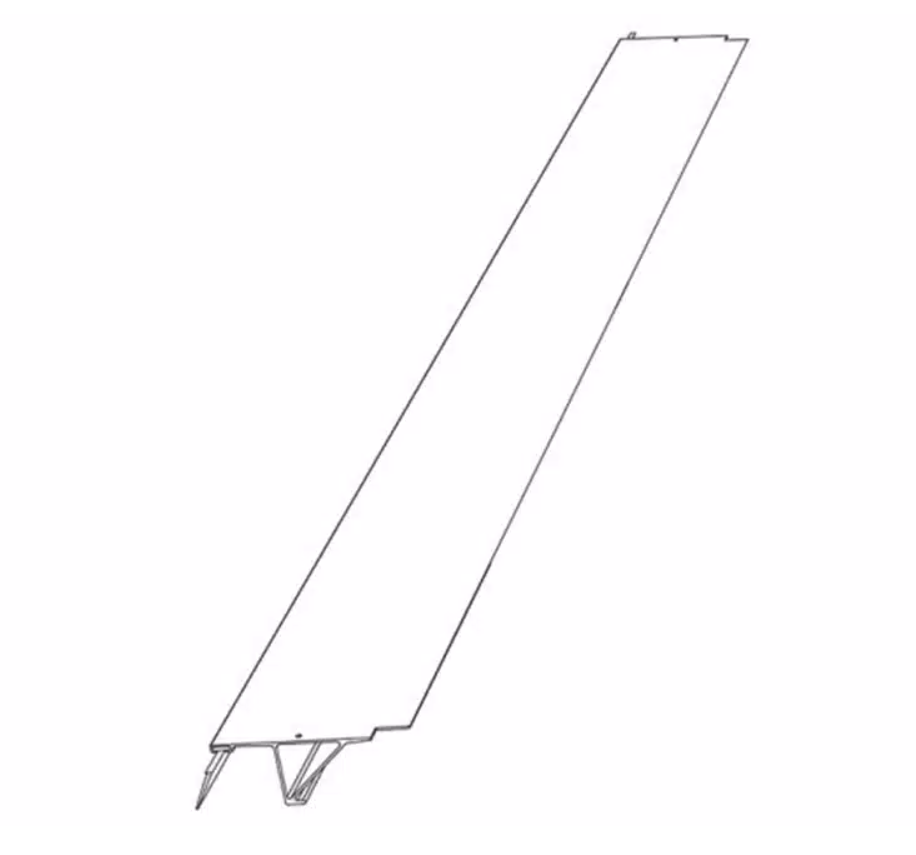
Retrax Replacement Standard Rail Assemblies
- Matte Finished Rail Kit for Attaching your Cover to your Truck Bed.
Includes: two rails (driver side and passenger side) and clamp and hardware kit
Fits all RetraxONE MX, RetraxPRO MX, PowertraxONE MX, and PowertraxPRO MX Applications
Unveiling the Secrets of Retrax: From Components to Customization
Truck owners, gear up! We’re about to dive deep into the world of Retrax bed covers, uncovering everything you need to know about their parts, maintenance, and customization. Whether you’re a seasoned Retrax user or considering joining the club, this guide will equip you with the knowledge to keep your truck bed cover in top shape. Let’s roll up our sleeves and get started!
The Anatomy of a Retrax Bed Cover: Breaking It Down
First things first, let’s get acquainted with the key components of a Retrax bed cover. These innovative covers are more than just a sheet of metal or plastic; they’re a carefully engineered system designed to protect your truck bed while offering convenience and style.
- The Canister: This is the heart of your Retrax cover, housing the retractable mechanism.
- Slats: These interlocking pieces form the actual cover surface.
- Side Rails: They guide the cover as it opens and closes.
- Seals: These keep water and debris out of your truck bed.
- Locking Mechanism: Ensures your cover stays securely closed.
- Drain Tubes: Help channel water away from your truck bed.
Understanding these parts is crucial for maintenance and troubleshooting. But here’s the kicker: Retrax covers are designed to be low-maintenance, so you won’t need to fuss with them often.
The Hunt for Replacement Parts: Where to Look
So, you’ve identified a part that needs replacing. Where do you turn? While Retrax covers are built to last, wear and tear happens. Your best bet is to start with authorized Retrax dealers. These folks know their stuff and can help you identify the exact part you need.
But what if you’re more of a DIY enthusiast? Fear not! Many online retailers specialize in truck accessories and carry Retrax parts. Just be sure to have your model number handy – Retrax covers aren’t one-size-fits-all, and using the wrong part can lead to headaches down the road.
Cracking the Code: Identifying Your Retrax Parts
Speaking of model numbers, let’s talk about how to identify your Retrax parts. It’s like being a detective, but instead of solving crimes, you’re solving truck bed cover mysteries!
First, locate the serial number on your cover. It’s usually on a sticker inside the canister. This number is your golden ticket to finding the right parts. Retrax’s website often has detailed parts diagrams that can help you pinpoint exactly what you need.
Pro tip: Take photos of your cover and any damaged parts before ordering replacements. This visual aid can be a lifesaver when communicating with dealers or online support.
The Universal Question: Are All Retrax Parts Created Equal?
Here’s a common misconception: all Retrax parts are interchangeable. Not so fast! While some components might be universal, many are model-specific. This is especially true for things like side rails and canisters, which are designed to fit specific truck models.
Always double-check compatibility before purchasing. The last thing you want is to order a part, only to find it doesn’t fit your particular Retrax model. Trust me, I’ve been there, and it’s not a fun experience!
DIY Delight: Installing Replacement Parts
Alright, handy truck owners, this section’s for you. Installing replacement parts on your Retrax cover can be a satisfying DIY project. But before you dive in, make sure you have the right tools. Typically, you’ll need:
- A set of hex wrenches
- Screwdrivers (both flathead and Phillips)
- Pliers
- A socket set
Most Retrax parts come with detailed installation instructions. Follow these to the letter – they’re not just suggestions! If you’re visual learner, many helpful installation videos are available online.
Remember, patience is key. Rushing through the installation can lead to damaged parts or an improperly functioning cover. Take your time, and don’t be afraid to ask for help if you’re unsure about any step.
The Price Tag: What to Expect for Replacement Parts
Let’s talk money. The cost of Retrax replacement parts can vary widely depending on what you need. Small components like seals or drain tubes are generally affordable, often under $50. Larger parts like side rails or entire canisters can run into the hundreds of dollars.
Keep in mind that investing in quality parts now can save you money in the long run. Cheap knock-offs might be tempting, but they often lead to more frequent replacements and potential damage to your cover.
TLC for Your Retrax: Maintenance Tips
Want to avoid frequent part replacements? A little TLC goes a long way. Here are some tips to keep your Retrax cover in top shape:
- Regular cleaning: Wipe down your cover with a mild soap solution to prevent dirt buildup.
- Lubrication: Occasionally apply a silicone-based lubricant to the slide rails for smooth operation.
- Seal inspection: Check your seals periodically for signs of wear or damage.
- Drain tube clearance: Ensure your drain tubes aren’t clogged with debris.
By following these simple steps, you’ll extend the life of your cover and reduce the need for part replacements.
Blueprints for Success: Finding Parts Diagrams
A parts diagram can be a lifesaver when you’re trying to identify a specific component. Retrax often provides these diagrams in their owner’s manuals. If you’ve misplaced yours, don’t worry – many are available online through Retrax’s website or authorized dealers.
These diagrams are like treasure maps for truck enthusiasts. They show you exactly how each part fits into the bigger picture of your bed cover.
The Usual Suspects: Commonly Replaced Parts
While Retrax covers are built to last, some parts naturally wear out faster than others. The most frequently replaced parts include:
- Seals: These can dry out or become damaged over time.
- Lock mechanisms: Frequent use can lead to wear.
- Drain tubes: They can crack or become brittle, especially in extreme temperatures.
Knowing these common weak points can help you stay ahead of potential issues.
Warranty Wisdom: What’s Covered?
Good news! Many Retrax parts are covered under warranty. Typically, Retrax offers a limited lifetime warranty on the structural components of their covers. However, wear items like seals might have a shorter warranty period.
Always check your warranty documentation before purchasing replacement parts. In some cases, you might be eligible for free replacements or repairs.
Troubleshooting 101: Diagnosing Issues
Before you start replacing parts, it’s important to correctly diagnose the issue. Here are some common problems and their potential causes:
- Cover won’t retract smoothly: Could be debris in the rails or worn slats.
- Water leakage: Often due to damaged seals or clogged drain tubes.
- Locking issues: Might be a problem with the latch mechanism or lock cylinder.
When in doubt, consult your owner’s manual or reach out to Retrax customer support. They can often help you pinpoint the issue without unnecessary part replacements.
The Digital Marketplace: Online Shopping for Retrax Parts
In today’s digital age, you can find almost anything online – including Retrax parts. Many reputable online retailers specialize in truck accessories and carry a wide range of Retrax components.
When shopping online, always verify the seller’s credibility and check customer reviews. Look for sellers who offer genuine Retrax parts and have a solid return policy. Remember, saving a few bucks on a questionable part isn’t worth the potential headache down the road.
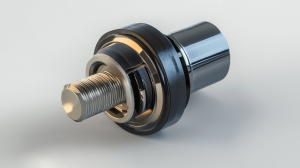
Locksmith Skills: Replacing Your Retrax Lock
The lock is a crucial component of your Retrax cover, keeping your cargo secure. If you need to replace it, here’s a quick guide:
- Locate the lock cylinder (usually near the tailgate end of the cover).
- Remove any retaining clips or screws holding the lock in place.
- Carefully extract the old lock cylinder.
- Insert the new lock cylinder, ensuring it’s properly aligned.
- Secure the new lock with the retaining clips or screws.
- Test the lock to ensure smooth operation.
Remember, if you’re not comfortable with this process, it’s always best to consult a professional.
Tool Time: Gearing Up for Retrax Repairs
Having the right tools can make all the difference when working on your Retrax cover. In addition to the basic tools mentioned earlier, consider adding these to your toolkit:
- A tape measure (for precise part measurements)
- A rubber mallet (for gentle persuasion during installation)
- A set of needle-nose pliers (perfect for working with small components)
Investing in quality tools will make your DIY repairs much smoother and more enjoyable.
Rail Replacement: A Step-by-Step Guide
Replacing the rails on your Retrax cover might seem daunting, but it’s manageable with some patience. Here’s a simplified guide:
- Remove the cover from your truck bed.
- Detach the old rails, noting how they’re connected to the canister.
- Clean the mounting surfaces on your truck bed.
- Align the new rails carefully, ensuring they’re level.
- Secure the new rails using the provided hardware.
- Reattach the cover and test for smooth operation.
Remember, this is a simplified overview. Always refer to your specific model’s instructions for detailed guidance.
Knowledge is Power: Finding Installation Guides
Retrax understands that many truck owners like to handle their own maintenance. That’s why they provide detailed installation guides for most of their parts. These guides are usually available:
- In the packaging of new parts
- On the Retrax website
- Through authorized dealers
Don’t hesitate to use these resources – they can save you time and prevent costly mistakes.
Sealing the Deal: Replacing Retrax Seals
Seals play a crucial role in keeping your truck bed dry and clean. Here’s how to replace them:
- Remove the old seal, noting its placement and orientation.
- Clean the surface where the seal sits to ensure good adhesion.
- Apply the new seal, starting at one end and working your way along the cover.
- Press firmly to ensure a good seal without any gaps or bubbles.
Pro tip: On a hot day, let the new seal sit in the sun for a few minutes before installation. This makes it more pliable and easier to work with.
Finding Your Retrax Guru: Locating Authorized Dealers
While DIY is great, sometimes you need expert help. Authorized Retrax dealers are your go-to for professional assistance. They offer:
- Genuine Retrax parts
- Expert installation services
- Valuable advice on maintenance and troubleshooting
To find an authorized dealer near you, check the Retrax website or give them a call. Many dealers specialize in truck accessories and can offer insights on complementary products as well.
Slat Replacement: Reviving Your Cover’s Core
The slats are the backbone of your Retrax cover. If they’re damaged, here’s how to replace them:
- Fully extend your cover and identify the damaged slat(s).
- Remove the end caps from the canister.
- Carefully slide out the damaged slat(s).
- Insert the new slat(s), ensuring they interlock correctly with adjacent slats.
- Replace the end caps and test the cover’s operation.
This process can be tricky, so don’t hesitate to seek professional help if you’re unsure.
The Warning Signs: When Parts Need Replacing
Knowing when to replace parts can prevent bigger issues down the line. Watch out for these signs:
- Unusual noises when operating the cover
- Visible cracks or damage to any components
- Difficulty opening or closing the cover
- Water leakage into the truck bed
- Loose or missing hardware
If you notice any of these issues, it’s time to inspect your cover and potentially replace some parts.
In conclusion, maintaining your Retrax bed cover doesn’t have to be a mystery. With this guide, you’re now equipped to handle most parts-related issues that come your way. Remember, a well-maintained cover not only looks great but also provides the best protection for your truck bed. So roll up those sleeves, grab your tools, and show your Retrax cover some love. Your truck (and your cargo) will thank you!